How To Make A Custom CD
Your Ultimate Guide on How to Make a Custom CD
So you’ve decided to make a custom CD. It’s more than just dragging some songs into a folder; it’s about curating a vibe, telling a story, and creating something physical and real. This is where you transform digital files into a personalized gift or a professional product that people can hold in their hands.
Laying the Groundwork for Your Custom CD Project
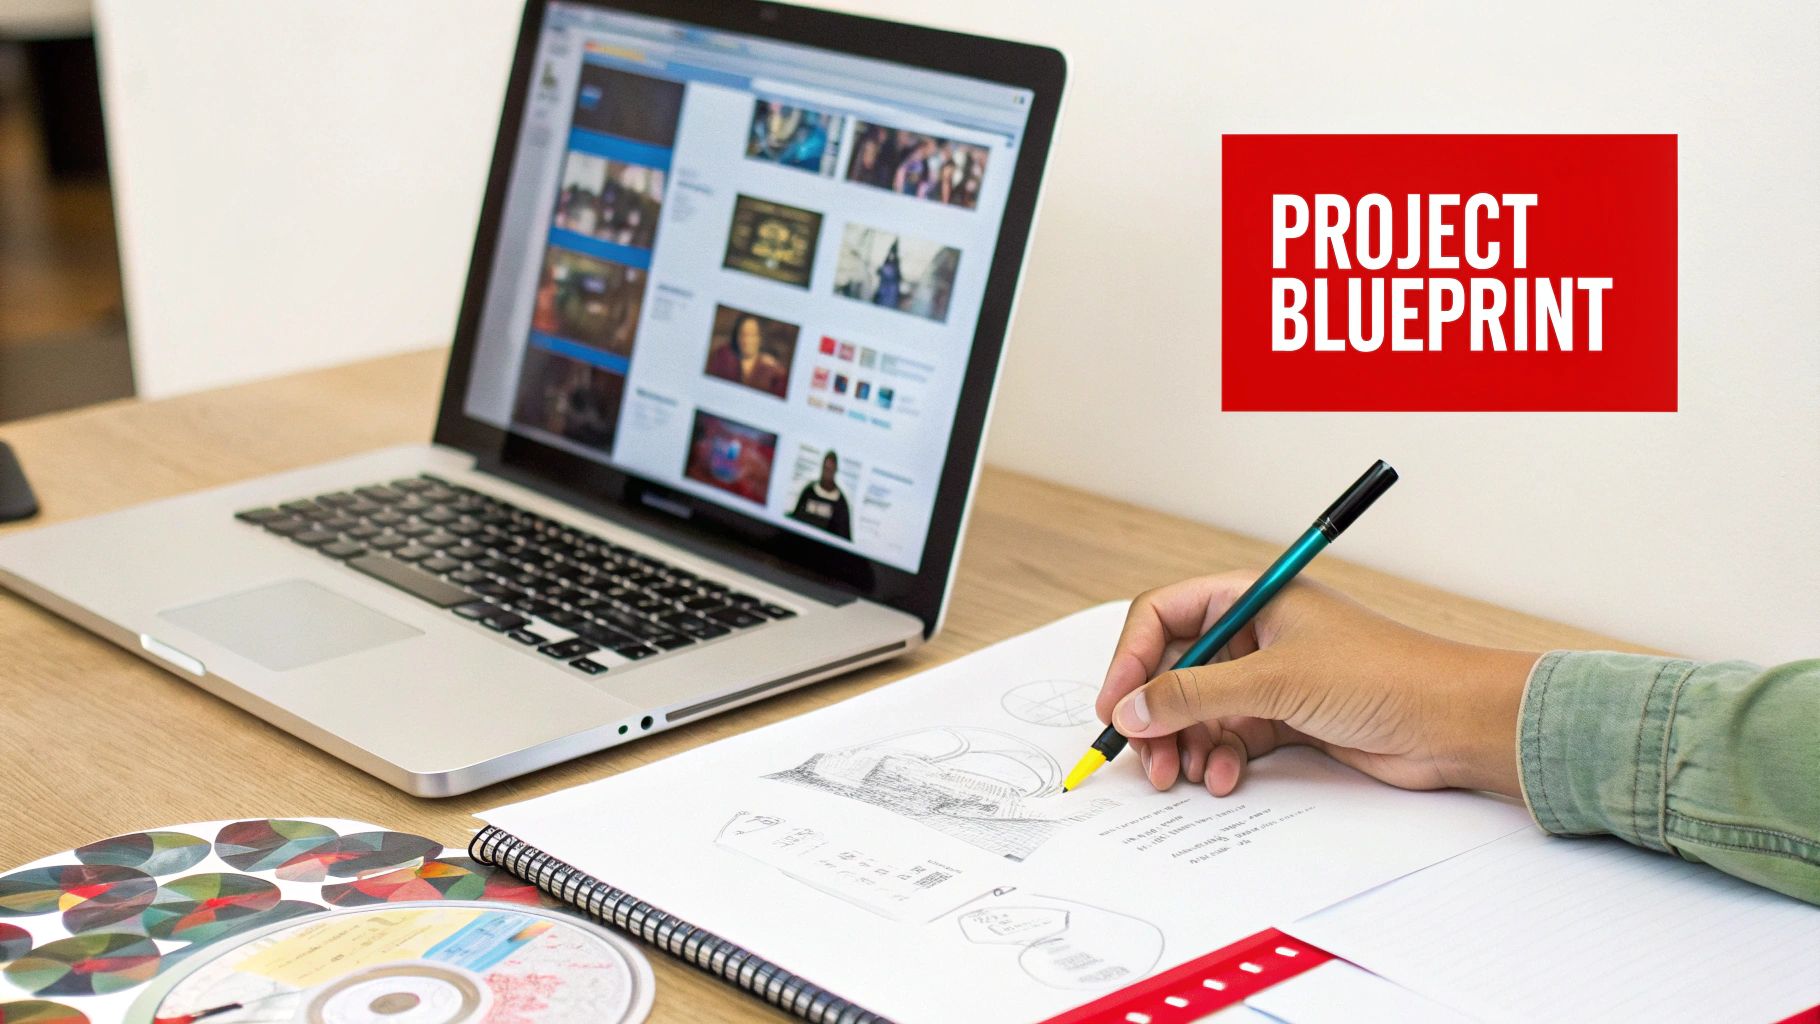
Before you even think about burning a disc or firing up design software, you need a plan. A solid concept is your blueprint, guiding every single choice you make from the first track to the final shrink-wrap. Think of it as setting the stage for the entire experience.
First things first: what’s this CD for? Is it a heartfelt anniversary gift packed with songs that trace your relationship? Or is it a polished demo for your band, meant to land you a gig? Knowing your audience and the occasion will define the entire project’s tone.
Curating a Playlist That Tells a Story
The playlist is the heart and soul of your custom CD. Anyone can just throw a bunch of songs together. You’re going to curate a collection that flows, building an emotional arc. A great mixtape is a journey, not just a list.
- Kick it off with a bang: Your first track sets the mood. Choose something that grabs the listener right away.
- Build a narrative: Arrange the songs to create tension and release. Think about the energy, moving from upbeat anthems to slower, reflective moments and back again.
- Mind the gaps: Pay close attention to how one song ends and the next one starts. Smooth transitions are what separate the amateurs from the pros, creating a seamless listening experience.
Think about it this way: a road trip mix should feel like the drive itself. It might start with an energetic anthem, mellow out for the long, scenic stretches, and then ramp back up as you near your destination. This kind of thoughtful sequencing is what makes a custom CD feel intentional.
Sourcing Your Audio and Art
Once you have your tracklist mapped out, it’s time to get serious about quality. Using low-res MP3s you downloaded a decade ago will give you a CD that sounds tinny and flat. You absolutely want to aim for lossless audio files like WAV or FLAC whenever you can. This is critical for getting a rich, professional sound.
The most thoughtful playlist in the world can be undermined by poor audio quality. Sourcing high-resolution files is the single most important technical step in the early planning phase.
Finally, start thinking visually. The cover art is the first thing anyone will see, and it makes a huge impression. Sketch out a few ideas that capture the music’s vibe. You’d be surprised how a simple, powerful image can elevate the whole package from just a disc to a piece of art.
Prepping Your Audio for a Professional Sound
Once you’ve got your playlist mapped out, it’s time for the step that truly separates an amateur mixtape from a professional-sounding album. Getting the audio prep right is the technical heart of the process, and it’s what makes your custom CD sound crisp, balanced, and powerful on any stereo system.
Think of it this way: if you build a house on a shaky foundation, it’s going to crumble. The same principle applies here. Using low-quality, compressed audio files will leave your final CD sounding thin and lifeless, no matter how much you tweak it later. The journey to great sound starts with your source files.
Why Lossless Audio Is Non-Negotiable
The single most important decision you’ll make at this stage is choosing the right audio format. Most of us are used to MP3s, which are fantastic for saving space on a phone. But they achieve that small file size by literally throwing away parts of the original audio data—a process known as lossy compression. That sonic detail is gone forever.
For a custom CD, you need to be working with lossless formats. These formats keep every single bit of the original recording intact, delivering the full depth and clarity the artist wanted you to hear.
- WAV (Waveform Audio File Format): This is the gold standard. It’s an uncompressed, studio-quality digital copy of the source audio, making it the absolute best choice for burning a CD.
- FLAC (Free Lossless Audio Codec): FLAC gives you the exact same pristine quality as a WAV file, but in a smaller package. It’s a great alternative if you’re trying to save a little hard drive space without sacrificing an ounce of quality.
Trying to make a great CD from a 128kbps MP3 is like trying to paint a masterpiece with only three colors. A lossless WAV or FLAC file gives you the entire palette to work with.
Choosing the Right Audio Format for Your CD
The audio format you choose directly impacts the final sound quality. This table breaks down the best options for your custom CD.
| Format | Best Use Case | Why It Matters |
|---|---|---|
| WAV | Final CD burning and professional audio mastering | Uncompressed and identical to the original studio recording, ensuring maximum fidelity. |
| FLAC | Archiving high-quality tracks and saving disk space | Lossless quality in a smaller file size than WAV. Perfect for storage before burning. |
| MP3 (320 kbps) | Digital sharing or when lossless isn’t available | The highest quality of a lossy format. It’s a decent compromise but will never match lossless. |
| MP3 (128 kbps) | Avoid for CD burning | Heavily compressed, resulting in a noticeable loss of detail and a thin, weak sound. |
Ultimately, starting with WAV or FLAC is the only way to guarantee your CD sounds as good as it possibly can.
Achieving Consistent Volume Across Tracks
Have you ever put on a playlist and had to constantly adjust the volume? One song is barely audible, and the next one is blasting your speakers. That’s a classic sign of an amateur mix. The fix is a process called audio normalization.
Normalization simply adjusts the volume of all your tracks to a consistent level. You can find this function in most audio editing software, including the free and powerful tool Audacity. Applying it to each track ensures a smooth, professional listening experience where no one has to touch the volume knob.
Normalizing your tracks isn’t about making them all sound the same; it’s about making sure they play at a similar perceived loudness. This simple step creates a seamless, professional flow from one song to the next.
For instance, a quiet acoustic track will naturally have a lower average volume than a loud rock anthem. Normalization brings the acoustic track’s peak volume up and the rock track’s down a bit so they feel balanced next to each other on the album. It’s a subtle but absolutely crucial touch.
If getting your tracks perfectly balanced sounds like a headache, the team at Mixtape Duplication can handle all the technical prep work for you.
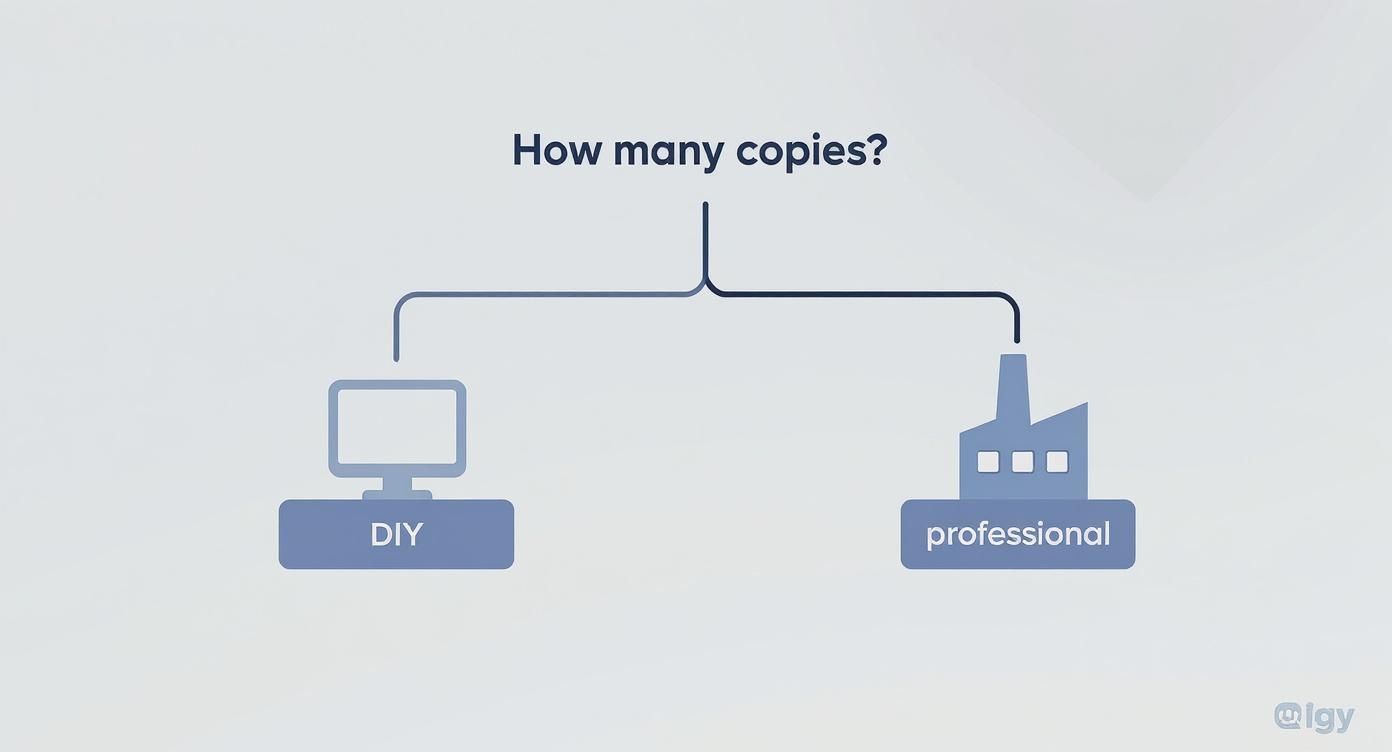
Choosing Your Path: DIY Burning vs. Professional Duplication
Alright, your audio files are polished and ready to go. Now you’ve hit a fork in the road: How do you get those digital tracks onto a physical CD? You really have two main options here—burning them yourself at home (DIY burning) or handing the job over to a professional duplication service.
The best choice really boils down to your project’s scale, your budget, and the kind of final product you’re aiming for.
Think of it like this: if you’re making dinner for a few friends, cooking at home is perfect. It’s personal, quick, and doesn’t cost much. But if you’re catering a wedding for 150 people, you hire a professional. You need the quality, consistency, and efficiency that only a pro can deliver. The same logic applies to making a custom CD.
The Case for DIY Burning
DIY burning is your best bet for small, personal projects. If you’re putting together a one-of-a-kind mixtape for an anniversary or just need a few CDs for a road trip, doing it yourself is a no-brainer.
The process is simple enough. You’ll need a computer with a CD/DVD drive, some blank CD-R discs, and burning software. Most operating systems like Windows and macOS already have this software built-in.
The biggest wins here are speed and the low upfront cost. You can turn your digital files into a finished CD in less than an hour, with no waiting on shipping. This approach is ideal when you need less than 20-30 discs.
But the DIY route has its limits. Quality control can be spotty, and home burners are notorious for creating duds or “coasters.” Plus, the cost-per-disc just doesn’t scale. Buying blank discs and jewel cases one by one gets expensive fast once you start needing more.
When Professional Duplication Makes Sense
When your project needs a more polished touch or you’re making a larger batch, duplication services are the way to go. This is the right path for indie bands needing 100 CDs for their merch table, businesses creating promotional giveaways, or anyone who wants a retail-quality product.
Going pro comes with some serious perks:
- Cost-Effective at Scale: While the initial order might seem like more, the price per disc plummets as you order more. Getting 100 CDs from a service is almost always cheaper than buying 100 blank discs and cases on your own.
- Superior Quality and Finish: Professionals use higher-grade equipment for both burning and printing. This means fewer errors and a durable, on-disc print that won’t smudge or fade over time.
- Tons of Customization: Services like Mixtape Duplication give you options you just can’t get at home, like full-color printed booklets, tray cards, and professional packaging like jewel cases or cool, eco-friendly Digipaks.
This is what takes your project from a homemade gift to a legitimate, professional product.
The decision often comes down to one thing: quantity. If you can count the number of people you’re making CDs for on your hands, DIY is fine. If you need enough for a crowd, professional duplication will give you a better look for a better price.
CD duplication is a massive part of the physical media world. The global disc manufacturing market was valued at around USD 5.2 billion in 2023, which shows just how relevant it still is for independent artists, developers, and educators. You can check out more about disc manufacturing market trends to see why physical media is still such a powerful tool. When you choose a professional service, you’re tapping into an established industry that guarantees your project will meet a high standard.
Designing Artwork That Makes an Impression
Your music is ready, but the experience of a custom CD starts way before someone hits play. It begins the moment they see the cover. The artwork is your album’s handshake—it sets the tone, tells a story, and makes a promise about what’s inside. Good design turns a simple disc into something people want to keep forever.
From the image printed on the CD itself to the front cover, tray card, and any booklets you include, every piece should work together. This is your chance to build a visual theme that feels like your music sounds. You’re creating a whole world for your playlist to live in.
Getting Your Designs Print-Ready
Making cool artwork is one thing, but getting it ready for a professional printer is a whole different ball game. It’s a step where a lot of people trip up.
Even if you’re new to design, free tools like Canva have templates that make it easy to create something that looks great. But to avoid rookie mistakes that can cost you money, there are two technical bits you absolutely need to nail.
- Color Mode (CMYK): Your computer screen shows colors in RGB (Red, Green, Blue). Professional printers use CMYK (Cyan, Magenta, Yellow, Key/Black). If you design in RGB, your printed colors will look dull and washed out. Always, always set your design software to CMYK for accurate color.
- Bleed: Ever seen a business card with a weird white sliver on the edge? That’s because it didn’t have a “bleed.” You need to extend your design about 1/8th of an inch beyond the final trim line. This gives the printer some wiggle room when cutting the paper, ensuring your art goes right to the very edge with no awkward borders.
Getting these details right is what separates a homemade-looking project from a truly professional product. It’s how you make sure what you get back from the printer looks just like what you designed on screen.
Choosing the Right Packaging
The packaging is the final piece of the puzzle. It’s not just there to protect the disc; it’s about presentation. It’s about how it feels in your hands. The right case elevates the entire experience.
You’ve got a few solid options, each with its own vibe:
- Classic Jewel Case: This is the standard, clear plastic case with a tray card and space for a booklet. It’s durable, everyone knows it, and it gives you plenty of real estate for artwork, lyrics, or thank-you notes.
- Slimline Case: A much thinner version of the jewel case. It’s a great choice if you want to save space or prefer a more modern, minimalist look.
- Digipak: This is the premium option. It’s made from cardstock with a plastic tray, so it opens up like a little book. Digipaks have a high-end, eco-friendlier feel that many artists and fans absolutely love.
Ultimately, the choice comes down to your budget and the vibe you’re going for. A gritty punk rock demo might feel perfect in a simple sleeve, while an ambitious concept album probably deserves a multi-panel Digipak.
If you’re trying to decide whether to burn them yourself or go with a pro service, this should make it simple:
For a handful of copies, DIY is fine. But for anything more, professional services deliver the quality and packaging options you need to make a real impact. If you want a pro finish without the hassle, the team at Mixtape Duplication can bring your entire vision to life.
Don’t Get Sued: A Simple Guide to Copyright for Your Custom CD
So, you’re ready to make a custom CD, but you’re using songs you didn’t write. This brings us to the often-confusing world of copyright. Getting this part right is crucial, so let’s break it down in simple terms to keep your project fun and, more importantly, legal.
The biggest factor is how you plan to use the CD. Are you making a single copy for your own car, or maybe as a one-off birthday gift for your best friend? If you legally bought all the tracks and it’s just for personal use, you’re generally in the clear. Think of it as fair use—you’re just enjoying music you already own in a different format.
When You Absolutely Need a License
Everything changes the moment money or promotion enters the picture. If you plan to sell your compilation at a local market, hand it out to promote your business, or you’re an indie band wanting to sell a CD of cool cover songs, the rules are completely different.
In these cases, you’ve crossed the line from personal use to distribution. You’re now a publisher, and you need legal permission.
This permission is called a mechanical license. It’s an agreement with the song’s publisher that allows you to reproduce and hand out their work. Skipping this step can lead to some seriously scary legal and financial trouble for copyright infringement. Nobody wants that.
Think of it like this: Making a mixtape for your buddy is like jotting down a recipe for them. Trying to sell that mixtape is like printing that same recipe in a cookbook you’re selling—you’d better get permission from the original chef first.
Why This Matters Now More Than Ever
Staying on the right side of the law is smart, especially since physical media is booming in niche markets. The duplication disc market, which is the backbone of custom CD creation, is expected to be worth USD 1.18 billion in 2024. That growth is powered by indie artists and creators who need professional, short-run CDs for their merch tables. You can read more about the duplication market’s growth to see just how big this is.
To keep your project clean and compliant, you’ve got a few options:
- Use Your Own Music: The easiest path. If you wrote and recorded it, you own it. Do whatever you want with it!
- Find Royalty-Free Tracks: Sites like Epidemic Sound or Artlist offer massive libraries of music you can license for your projects without worrying about ongoing payments.
- Get a Mechanical License: For cover songs, this is non-negotiable. Services like Easy Song Licensing exist to make this process much less painful, helping you secure the rights you need to distribute legally.
By figuring this out ahead of time, you can get back to the fun part—creating an awesome custom CD that’s both creative and legally sound.
The Final Assembly and Quality Check
This is the moment of truth. All your planning, audio prep, and design work are about to come together into a finished product you can hold in your hands. Whether you burned the discs yourself or sent them off to a pro, this final quality check is what guarantees your custom CD looks and sounds exactly how you imagined.
Don’t rush this part. It’s what separates a good project from a great one.

If you took the DIY route, it’s time to get hands-on. Your first move should always be to test the master disc—the very first one you burned. Pop it into a few different players. I’m talking about your car stereo, an old boombox, your computer… everywhere. You need to confirm every track plays perfectly without any skips or weird glitches. This simple test can save you from the nightmare of duplicating a faulty burn.
Once you know the master is good, you can start assembling. Carefully place your printed inserts and tray cards into the jewel cases or Digipaks. Pay attention to the little things, like making sure the spine text on the tray card is aligned just right. A clean, neat package makes all the difference.
Submitting Your Files for Professional Duplication
Working with a duplication service? Your “assembly” happens digitally, before anything even goes to print. This means your quality check is all about the files you’re about to submit. Professional services like ours provide specific templates and guidelines for your audio and artwork for a reason—following them to the letter is crucial.
Before you hit “upload,” run through this final checklist:
- Artwork Format: Are your files set to CMYK color mode? Did you include the proper bleed so nothing gets cut off?
- Audio Files: Is every single track a high-quality WAV file? Are they all correctly named and numbered in the right sequence?
- Tracklist Accuracy: Does the tracklist you submitted match your audio files exactly? No typos?
Double-checking these details prevents the most common production delays. One simple typo in a song title or a wrong file format can bring the whole process to a halt. A few extra minutes of review now is absolutely worth it.
A final quality check isn’t just about catching errors—it’s about respecting the effort you’ve put in. This last step ensures the physical product lives up to the creative vision you started with.
The Last Listen Before You Share
No matter which method you chose, the ultimate test is listening to a final, fully packaged copy from start to finish. This is your chance to experience the project exactly as your audience will. You’ll catch any last-minute issues, but more importantly, you get to appreciate the tangible result of all your hard work. This is the moment your project becomes a real piece of art, ready to be shared.
Even with streaming everywhere, physical media still holds a special place for creators and fans. The global compact disc market is projected to hit around $470.26 million in 2025, driven by collectors and dedicated music lovers who crave a physical connection to the art they love. You can read more on the resilience of the CD market and see why knowing how to make a great custom CD is still such a powerful skill.
Ready to create a professional, high-quality custom CD without the DIY hassle? The experts at Mixtape Duplication can turn your playlist into a beautifully packaged, ready-to-share masterpiece. www.cdinsertprints.com