CD Insert Prints
How to Record Onto CD The Complete Guide
Even with instant streaming at our fingertips, there’s something special about creating a physical CD. Knowing how to record onto cd is a timeless skill, whether you’re making a heartfelt mixtape for a friend’s old car, archiving audio you can’t afford to lose, or helping a new band get their first demo out there. It’s a craft that’s still surprisingly relevant.
Why Bother Burning a CD Anymore?
In a world of digital playlists, the act of burning a physical compact disc holds a unique kind of weight. It’s not just about nostalgia; it’s about creating a tangible connection to the music—a sense of permanence that a fleeting digital file just can’t match. The process is deliberate, turning a simple list of songs into a thoughtful, curated experience.
People still choose to record onto a CD for all sorts of practical reasons:
- Thoughtful Gifting: A custom mixtape is a classic for a reason. It’s the perfect gift for an anniversary, a long road trip, or just to share a specific musical vibe with someone you care about.
- Secure Archiving: For musicians, podcasters, or serious audiophiles, a CD is a reliable physical backup for master audio files. It’s your insurance against a hard drive crash or corrupted cloud storage.
- Independent Music Distribution: For emerging artists, CDs are a cheap and effective way to share music at gigs, sell at the merch table, and literally put their sound into the hands of new fans.
- Offline Accessibility: Let’s face it, internet isn’t everywhere. For older car stereos or in places with spotty service, a CD means your music is always ready to go—no subscription or signal needed.
A Quick Look Back at the CD’s Golden Era
The compact disc was once the undisputed king. This image is a throwback to the physical format that completely reshaped how we bought and listened to music.
That familiar rainbow shimmer on the disc’s data layer is a sight that defined music for an entire generation. At its absolute peak around the year 2000, the format was selling a staggering 2.4 billion units globally. But by 2015, those sales had plummeted by over 74%, signaling a massive shift in listening habits. You can read more about the CD’s wild market ride on musicbusinessresearch.wordpress.com.
Setting Up for a Perfect Burn
Before you even think about hitting that burn button, a bit of prep work can mean the difference between a flawless audio CD and a useless plastic coaster. Getting these details right from the start is your ticket to a project that sounds professional and plays reliably, whether it’s a gift for a friend, an archive of important tracks, or your band’s first demo.
The first big decision? The disc itself.
Choosing Your Blank Disc: CD-R vs. CD-RW
What you grab off the shelf directly impacts what you can do with the final product. A CD-R (Compact Disc-Recordable) is a write-once deal. Once you burn your audio onto it, that’s it—the data is permanent. This makes them perfect for final projects like albums or permanent archives where you can’t risk anything being accidentally erased.
Then you have the CD-RW (Compact Disc-ReWritable), which you can write on, erase, and rewrite thousands of times. They’re great for testing out a playlist, making temporary backups, or creating a mix for the car that you know you’ll want to update in a few months.
But there’s a catch. Some older CD players, especially those made before the late 90s, have trouble reading CD-RWs because of their lower reflectivity. For maximum compatibility, a CD-R is almost always the safer bet.
This quick comparison should help you pick the right tool for the job.
Choosing Your Blank Disc CD-R vs CD-RW
| Feature | CD-R (Recordable) | CD-RW (ReWritable) |
|---|---|---|
| Purpose | Final versions, archives, gifts | Testing, temporary backups, evolving playlists |
| Data Permanence | Write-once, permanent | Can be erased and rewritten |
| Compatibility | Excellent; works in most CD players | Good; may not work in some older stereos |
| Best For | Albums, demos, permanent data storage | Creating test discs, temporary data transfer |
Ultimately, your choice boils down to whether you need a permanent copy or the flexibility to change things later.
This decision tree shows the common goals that lead people to burn a CD in the first place, helping you clarify your project’s purpose.
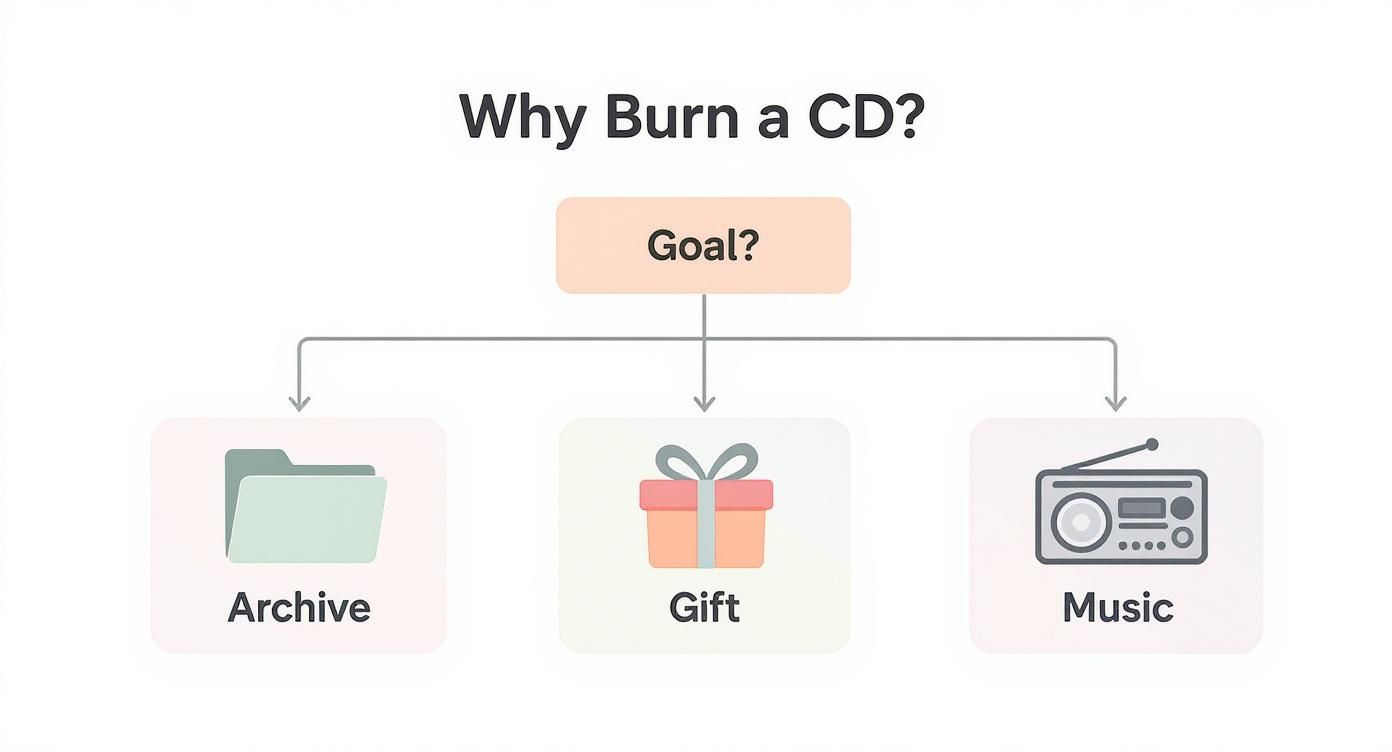
As you can see, whether you’re archiving files, creating a gift, or sharing music, each path benefits from careful prep.
Preparing Your Audio Files
With your disc chosen, it’s time to get your audio tracks in order. How you handle these files has a massive impact on the final listening experience.
Always start with the highest quality audio format you can get your hands on. If you have the option, use uncompressed formats like WAV or AIFF. These files contain all the original audio data, which translates to the best possible sound on the final CD. While MP3s are great for your phone, they are “lossy,” meaning audio data has been permanently stripped out to make the file smaller. Burning from MP3s can lead to a noticeable drop in quality, especially on a decent sound system.
Next up is volume. Ever put on a mix where one song is barely a whisper and the next one blows your speakers out? That’s where audio normalization saves the day.
Normalization is just a fancy term for adjusting all your tracks so they play back at a similar, consistent volume. Most burning software has a built-in feature for this—look for a checkbox labeled “Normalize volume” or “Sound Check.” You’ll want to enable it for a smooth, professional-sounding result.
Finally, think about the journey. The track order and the silence between the songs are crucial for creating a cohesive vibe.
- Arrange Your Tracks: Drag and drop your files into the order you want. Think about the energy and mood. Are you starting with a banger or building things up slowly?
- Set the Gaps: The standard audio CD has a two-second gap of silence between tracks, and most software defaults to this. But you can usually change it. For a live album or a mix where songs are meant to flow right into one another, you can set the gap to zero for a seamless, continuous play.
How to Record Onto a CD with Windows Media Player
If you’re on a Windows PC, you don’t need to hunt down fancy software to burn a CD. Good old Windows Media Player (WMP), a tool that’s probably already sitting on your computer, has everything you need to record onto a CD with no fuss. The whole process is surprisingly simple once you walk through it once.
Let’s say you’re putting together the perfect road trip mixtape. You’ve already got your high-energy anthems and chill cruising tunes lined up as audio files. Your mission is to get them onto a physical CD that will play in any car, whether it’s brand new or has a tape deck. This is where WMP steps in.
It’s easy to forget, but the CD was once the undisputed king. It completely changed how we listened to music in the late ’80s, and by the year 2000, it held a staggering 92% of the U.S. music market. Even though sales have dropped since then, there’s still something deeply satisfying about creating a physical disc. You can read more about the CD’s market history on Wikipedia.
Creating Your Burn List
First things first, open up Windows Media Player. If it’s not pinned to your taskbar, just type its name into the Windows search bar. Once you’ve got it open, look over to the top-right corner for a tab labeled Burn. Give that a click, and you’ll see your burning workspace pop up.
Now it’s time to build your playlist, which WMP calls a “Burn List.” This is the fun part. Just drag and drop your audio files from your music library right into that burn pane on the right. For our road trip mix, you’d pull over your carefully chosen tracks one by one.
As you add songs, you can easily change their order. Want to tweak the vibe? Just click and drag a track up or down the list until the flow feels right. Think about the energy you want to build—maybe start with something upbeat to kick off the drive and end with a more reflective song as you pull into your destination.
Configuring Your Burn Options
With your tracklist locked in, it’s time to check the settings. Click the little icon with a checkmark at the top of the Burn pane. This opens the Burn options menu, which is where you’ll make the most important decision for your project.
You’ll have to choose between creating an Audio CD or a Data CD.
- Audio CD: This is the classic format you need for maximum compatibility. An audio CD will play in pretty much any player you can find, from a vintage boombox to your car stereo. The trade-off is that you’re limited to about 80 minutes of music.
- Data CD: This option basically turns your disc into a USB drive. You can cram hundreds of MP3s onto it, but it will only play on devices that specifically read MP3 files, like computers or some newer car stereos. For our road trip playlist, Audio CD is definitely the way to go.
Pro Tip: Always, and I mean always, choose a slower burn speed. It’s tempting to select “Fastest,” but that seriously increases the risk of errors that can make your disc a coaster. A slower speed, like 8x or 16x, ensures a much more reliable burn and a perfect CD every time.
Launching the Burn Process
Once your options are set, pop a blank CD-R into your computer’s optical drive. WMP should detect it and show its total capacity—usually 80 minutes. You’ll see a handy bar at the bottom showing how much space your playlist is taking up.
When you’re happy with everything, hit the Start burn button. WMP will get to work, and you can watch the progress as it writes each track to the disc. It’s a good idea to avoid any heavy-duty computer tasks while it’s burning, just to be safe.
After the last track is written, WMP will automatically eject the disc. That’s it! Your road trip mixtape is ready to roll. You’ve just successfully managed to record onto a CD using a tool you already had, turning a digital playlist into something real for your journey.
Burning a Flawless Audio CD on Your Mac
If you’re a Mac user, you’re in luck. The tools you need to record onto CD are built right into macOS. Whether you’re using the newer Music app or an older version of iTunes, the process is clean and surprisingly powerful, giving you professional control without having to download any third-party software.
Let’s say you’re an indie musician getting a short demo CD ready for your next gig. You need a professional, great-sounding disc that will play everywhere—from a beat-up car stereo to a high-end home audio system. The Music app is where you’ll make it happen.
Build Your Playlist in the Music App
First things first, you need to organize your tracks. Instead of just burning loose files, you’ll want to create a dedicated playlist inside the Music app. Think of this as the blueprint for your CD. It lets you get the song order just right, tweak the timing, and make sure everything is perfect before you hit “burn.”
Getting started is easy. Open the Music app and go to File > New > Playlist. Give it a memorable name like “Demo CD 2024” so it’s easy to find later. From there, just drag and drop your final audio files (ideally high-quality WAV or AIFF formats) into the playlist.
Once the tracks are loaded, you can perfect the listening experience. Drag the songs up or down to set the perfect sequence. This is your chance to build a real narrative with your music, making sure the energy flows exactly how you want it to.
Master Mac-Specific Burn Settings
With your playlist dialed in, it’s time to dig into the burn settings. This is where you handle the technical details that ensure your CD sounds great and plays on any device. Right-click (or Control-click) on your playlist in the sidebar and choose Burn Playlist to Disc. A new window will pop up with a few crucial options.
Here are the key settings you’ll want to get right for a pro-level audio CD:
- Preferred Speed: It’s tempting to select “Maximum Possible,” but trust me, that’s a classic mistake that often leads to errors. For the best reliability, always pick a slower speed like 4x or 8x. This gives the laser more time to etch the data accurately, which seriously reduces the chance of a failed burn.
- Disc Format: This is the most important choice you’ll make. You absolutely must select Audio CD. This is the universal format that works in all standard CD players. The other option, “MP3 CD,” creates a data disc that will only play on computers and some newer, more specialized players.
- Gap Between Songs: The default is usually two seconds, which is fine for most albums. But if you have tracks that are meant to flow right into each other, you can set this to “None” for a seamless, gapless playback experience.
A killer feature built into the Music app is Sound Check. You can find it in your Music app preferences under the “Playback” tab. This feature automatically balances the volume across all your tracks. Turning it on prevents one song from being way louder than the next, giving you a smooth, professional listen from start to finish.
Kick Off the Burn
After double-checking your settings, pop a blank CD-R into your Mac’s optical drive. If you’re on a newer Mac, you’ll likely need an external one. The Music app should detect the disc right away.
Give your playlist and settings one last look. When you’re sure everything is perfect, click the Burn button. Your Mac will start writing the audio to the disc. To be safe, avoid running any heavy-duty programs while it’s burning to prevent interruptions. Once it’s done, the disc will pop out, and your professional demo CD is ready to go.
Fixing Issues and Finishing Your Project
There’s nothing like the feeling of pulling that first successfully burned disc from the tray. But sometimes, things just don’t cooperate. Even with the best prep work, you can run into an error that turns your shiny new disc into a fancy coaster. Getting familiar with these common hiccups is the final step to mastering the art of recording onto a CD.
If you ever see a “buffer underrun” error, don’t sweat it. It’s a classic problem that just means your computer couldn’t shovel data to the burner fast enough. The simplest fix is to drop the burn speed and make sure to close any other programs before you try again.
Common Problems and Simple Fixes
What if your computer flat-out refuses to recognize a blank disc? The cause is usually pretty simple. First, give the disc a quick check for smudges or scratches. If it’s clean, your drive might just be picky—try using a different brand of CD-R.
Another classic issue is getting skips or distortion during playback. Nine times out of ten, this points to burning the disc too fast. Slowing things down to 8x or 16x gives the laser plenty of time to etch the data cleanly, which makes for a much more reliable listen.
- Disc Not Recognized: Check for dust or fingerprints. If the disc looks perfect, try updating your optical drive’s firmware. It’s a quick fix that can solve a lot of compatibility headaches.
- Failed Burn: This is almost always a multitasking issue. Avoid browsing the web or running other software while the burn is in progress. Giving the process your computer’s undivided attention is key.
- Poor Playback: Besides burn speed, take a look at your source files. If you started with low-bitrate MP3s, the final CD is never going to sound amazing. Garbage in, garbage out.
The best way to dodge errors is to just be patient with the process. Use good quality discs, pick a slow and steady speed, and let your computer focus on the task. A little extra time upfront saves a lot of frustration.
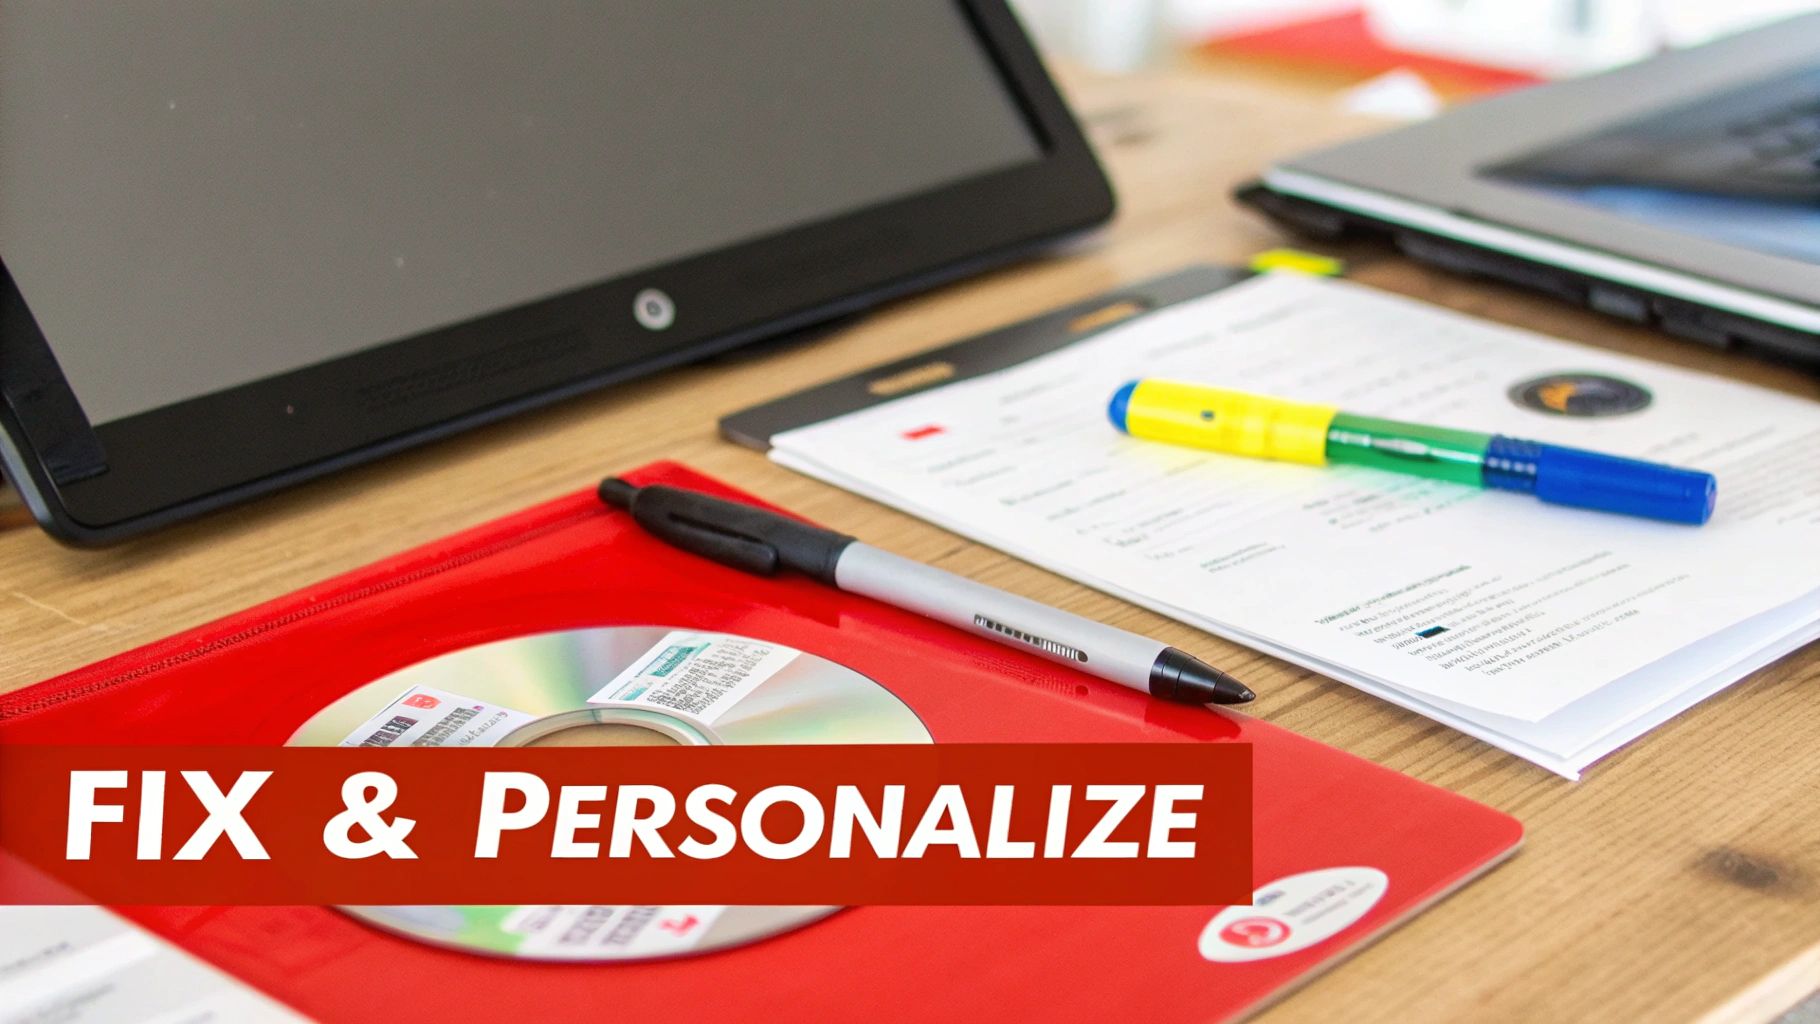
Putting a Personal Stamp on Your CDs
Once you have the technical side down, you get to the fun part. A custom CD is so much more than a playlist; it’s a whole experience. Designing your own jewel case insert and a label for the disc itself is what turns a simple copy into a thoughtful, professional-looking gift or demo.
You don’t need to be a graphic designer, either. Plenty of free online templates and tools can help you create slick layouts for your tracklist and cover art. You can print them at home or take them to a local shop for a truly polished look. For an artist, this step is non-negotiable—it makes your demo stand out from the stack.
And if you need more than a handful of copies? Look into a professional service. For bigger batches, a company like Mixtape Duplication can manage everything from high-quality printing to packaging, making sure every single disc looks and sounds perfect.
It’s funny—while everyone talks about streaming, physical CDs are making an interesting comeback. In the UK, 2023 was the first time in 20 years that the value of CD sales actually went up. This was driven by fans wanting to own premium, physical copies of their favorite albums. The latest ERA music sales report has all the details, but it proves that a well-made, personalized CD still means a lot to people.
Common Questions About Burning CDs
Even with the best instructions, a few questions always pop up when you’re about to burn your first disc. Getting these details right from the start can be the difference between a perfect mixtape and a shiny new coaster. Let’s tackle some of the most common hurdles.
Audio CD Versus Data CD
This is probably the biggest point of confusion. What’s the difference between an “Audio CD” and a “Data CD”?
An Audio CD is the classic format you’d buy in a store. It plays in just about everything—old car stereos, boomboxes, you name it. Its limit isn’t file size, but time: you get about 80 minutes of music, period.
A Data CD works more like a USB flash drive. You can drag and drop hundreds of MP3s onto it, limited only by the disc’s 700MB capacity. The catch? It will only play on devices that can read those specific file types, like a computer or some newer, MP3-friendly car stereos. For universal playback, Audio CD is the way to go.
When in doubt, always burn your music as an Audio CD. It’s the universal format for a reason and guarantees anyone can listen to it on any standard player.
How Many Songs Can a CD Hold?
This depends entirely on which format you choose.
If you’re making a standard Audio CD, you’re working with that 80-minute time limit. For an album full of typical three-to-four-minute pop songs, you can comfortably fit between 15 and 20 tracks.
But if you go with a Data CD, the game changes. You’re now limited by the 700MB of storage. A normal MP3 file is around 4-5MB, which means you could cram over 150 songs onto one disc. Just remember the compatibility tradeoff!
Why Did My CD Burn Fail?
It’s incredibly frustrating when a burn fails, but it usually comes down to one of a few simple things.
- Burn Speed: It’s tempting to pick the “fastest” setting, but this is the #1 cause of errors. A slower speed (like 8x or 16x) gives the laser more time to write the data properly and reliably.
- Disc Quality: Those no-name, bargain-bin discs are cheap for a reason. They have a much higher failure rate. Stick with trusted brands to avoid wasting your time and effort.
- Multitasking: Burning a CD demands your computer’s attention. Running other programs, especially ones that use a lot of resources, can interrupt the data flow and cause the burn to fail. Close everything else before you start.
And finally, a quick word on legality. In most places, it’s totally legal to make a copy of music you already own for your personal use—like burning a CD for your car. This is often called “format shifting.” However, making copies to sell, share, or distribute is illegal.
Want to create a truly special mixtape without all the hassle? The team at Mixtape Duplication can turn your favorite Spotify, Apple Music, or YouTube playlist into a professionally made custom CD, complete with personalized cover art. It’s the perfect gift for any occasion. CDinsertprints.com