Custom CD’s
Custom CDs and Cases Your Guide to Pro Packaging
In a world full of streaming playlists, ordering custom CDs and cases might feel a little old-school. But this physical format is still a serious power play for artists, businesses, and anyone looking to make a real, personal connection. A custom CD isn’t just data—it’s merchandise, a professional calling card, and a keepsake all rolled into one.
Why Custom CDs Still Matter
When everything is a fleeting digital file, holding something real in your hands makes an impact. Custom CDs and their cases cut through all that digital noise by giving your audience something they can see, touch, and own. That physical connection builds a sense of value and loyalty that a simple click or stream just can’t match.
For musicians, a custom CD is the backbone of the merch table. It takes a digital album and turns it into a premium product fans are excited to buy at shows or online. It’s not just about the music; it’s the whole package—the artwork, the liner notes, the professional finish—that tells your story and pulls the listener deeper into your world.
More Than Just Music
But the magic of custom CDs isn’t just for bands. All kinds of professionals and creatives use them to stand out:
- High-Impact Promo Tools: A branded CD with your company’s portfolio or a software demo leaves a much bigger impression than another email attachment lost in an inbox.
- Unforgettable Personal Gifts: Think about a custom mixtape for an anniversary, an audio memoir for a family reunion, or a unique party favor. These become treasures.
- Professional Photography Delivery: Photographers can elevate their entire client experience by delivering wedding photos on a beautifully designed custom disc and case.
A Market That’s Still Strong
It might sound strange, but physical media isn’t disappearing—it’s just finding its niche. The global CD publishing system market, which covers custom production, was valued at $1.95 billion in 2021 and is still projected to grow. This shows a steady demand for tangible products where branding and a polished presentation are everything. You can read more about the CD publishing system market trends at cognitivemarketresearch.com.
Think of a custom CD not as a data carrier, but as a vessel for your brand’s identity. The choices you make in packaging—from a classic jewel case to a modern Digipak—directly communicate the quality and care you put into your work.
At the end of the day, creating custom CDs and cases is an investment in how people see your brand. It says you’re serious about your craft and dedicated to giving your audience something special. This guide will walk you through every step, making sure your vision comes to life in a final product you can be proud of.
Choosing The Right CD Manufacturing Method
The very first choice you’ll make for your project is the disc itself. Deciding between duplication and replication is a crucial first step, as these two methods determine how your audio or data gets onto the CD. Your project’s size, timeline, and budget will point you to the right answer.
Think of it like this: CD duplication is like a high-end office printer—fast, flexible, and perfect for smaller jobs. On the other hand, CD replication is like a massive industrial printing press, built for huge runs where getting the lowest cost per unit is the top priority.
Understanding CD Duplication
CD duplication is the process of burning your data onto a ready-made, recordable disc, called a CD-R. A laser etches microscopic pits into the disc’s dye layer, essentially writing a digital map of your audio. This approach is perfect for quick turnarounds and smaller orders, usually anything under 500 units.
Because there’s minimal setup, duplication is incredibly flexible. Need 50 custom CDs as a wedding favor? Or maybe 200 for a limited EP release at your next gig? Duplication is your go-to. While the cost per disc is a bit higher than replication, you don’t have a big minimum order, making it the most accessible choice for many projects.
Diving Into CD Replication
CD replication is a much more involved, industrial process. It doesn’t use a standard CD-R. Instead, it begins with creating a glass master—a flawless, physical mold of your data. This master is then used to create “stampers” that physically press your data into molten polycarbonate, forming the body of the disc itself.
This is the industry standard for major commercial releases, like the albums you’d find in a record store. The higher upfront cost and time it takes to create the glass master mean it only makes financial sense for larger quantities, typically 500 units or more. Once that stamper is made, though, churning out thousands of discs is lightning-fast and incredibly cheap per unit.
A replicated disc isn’t just a copy; it’s a clone. The data is physically embedded in the disc’s structure, not just burned onto a dye layer. This results in maximum durability and playback compatibility on almost any device.
This visual guide can help clarify which path is right for your project’s specific goal.

As the infographic shows, different goals—from an artist’s album to a business’s promotional kit—often line up perfectly with a specific manufacturing method and packaging style.
CD Duplication vs Replication at a Glance
This table offers a direct comparison to help you choose the right CD manufacturing process based on your project’s specific needs.
| Feature | CD Duplication (CD-R) | CD Replication (Pressed CD) |
|---|---|---|
| Best For | Small runs (under 500 units), quick turnarounds, personal projects | Large runs (500+ units), major releases, retail distribution |
| Process | Burning data onto blank CD-R discs with a laser | Creating a glass master to physically press data into the disc |
| Minimum Order | As low as 25 units | Typically 500 units |
| Turnaround Time | Fast (usually a few business days) | Slower (can take several weeks due to glass mastering) |
| Cost Per Unit | Higher for small quantities | Significantly lower for large quantities |
| Quality | Excellent, but relies on the quality of the CD-R media | Highest possible, with maximum durability and compatibility |
Ultimately, the choice comes down to your project’s scale. Both methods produce a professional, high-quality product when done right.
Making The Right Choice For Your Project
So, how do you decide? It really boils down to three things: how many you need, how fast you need them, and your budget.
- Quantity is the Deciding Factor: If you need fewer than 500 discs, duplication is almost always the right call. If you need more than 500, replication starts to save you a lot of money on each disc.
- Speed and Deadlines: Duplication is much faster, often taking just a few business days. Replication, because of the glass mastering step, can take several weeks. If you have a show next weekend, duplication is the only way to go.
- Budget Considerations: For small runs, duplication has a lower total cost. For big runs, replication’s low per-unit price gives you far better value, easily making up for the initial setup fee.
Choosing between these two methods is a strategic decision. By matching the manufacturing process to your project’s needs, you’re setting yourself up for a successful run of custom CDs that look and sound fantastic.
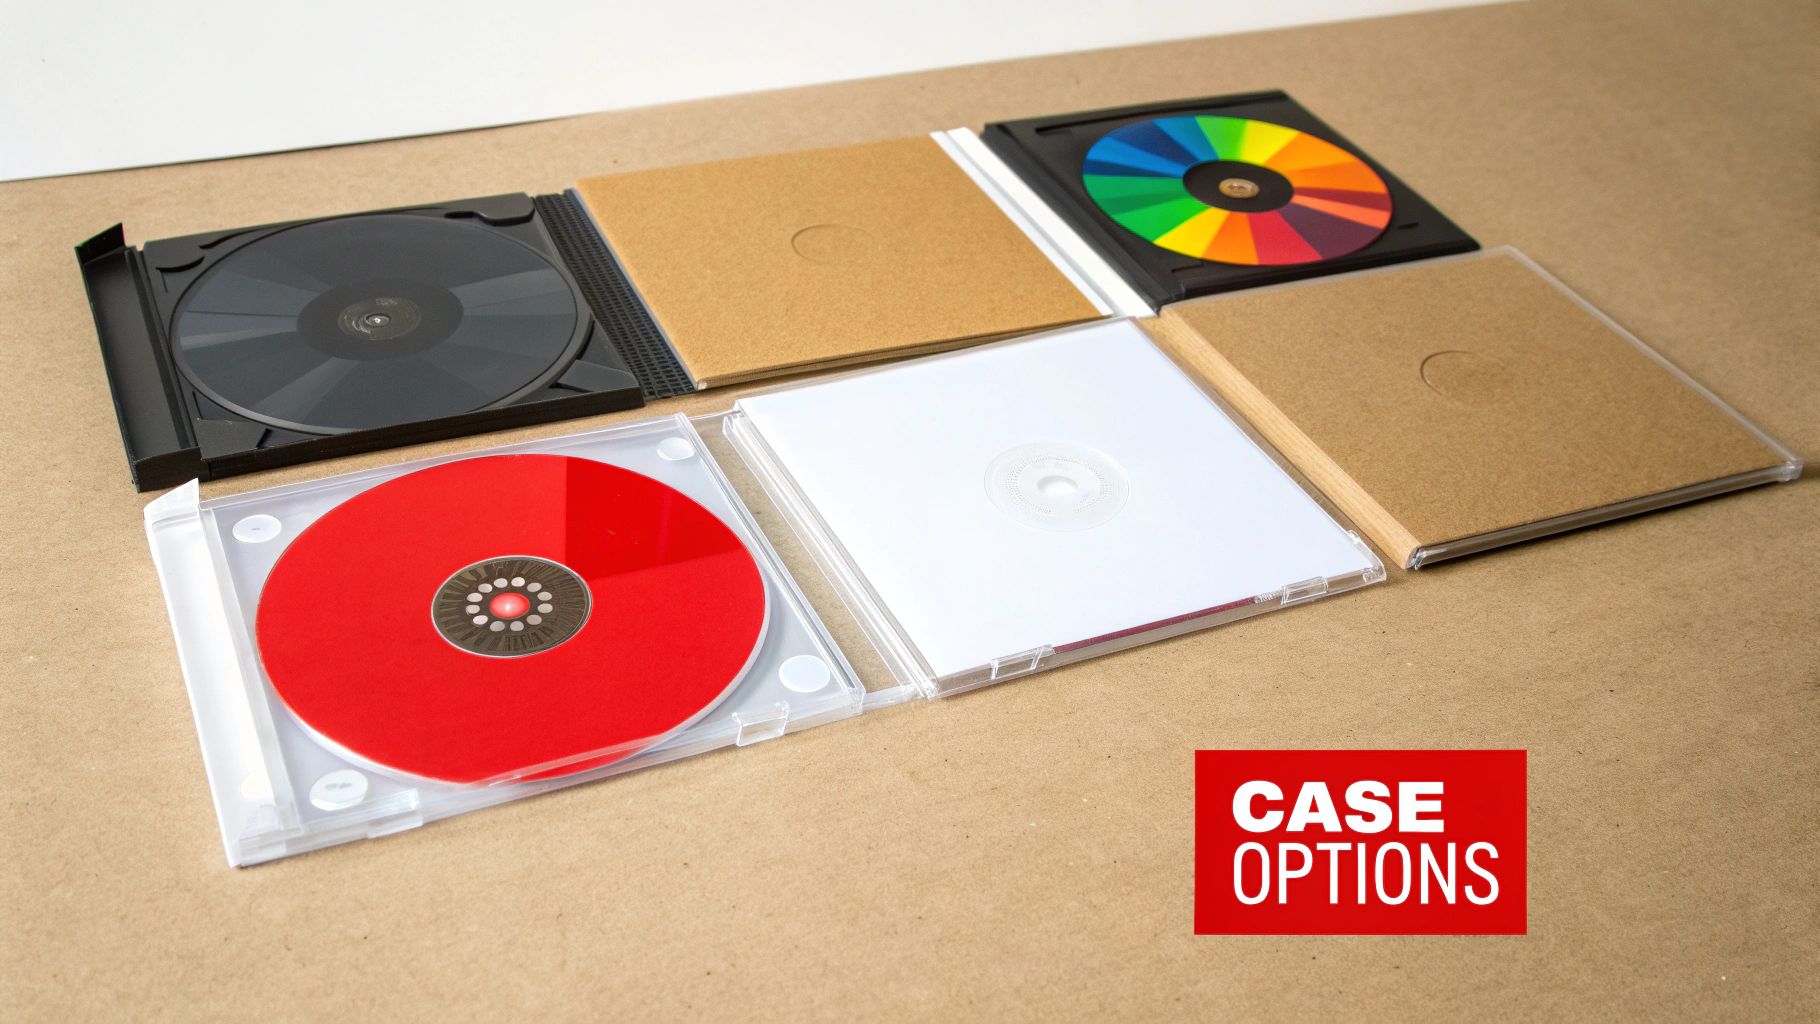
A Visual Guide to Custom CD Case Options
The right packaging does more than just protect your disc. It’s the first thing people see, turning a simple CD into a complete, tangible experience. Your choice of case sets the tone for everything inside, and it’s a huge part of making your custom cds and cases truly memorable.
This decision makes a real impact. That’s why the market for custom CD printing and packaging is still going strong, valued at around $1.2 billion in 2023. This industry keeps growing because artists, educators, and businesses know that a physical product has a unique kind of value. If you want to dive deeper, you can learn more about the continued relevance of physical media at atlantadisc.com.
Let’s walk through the most popular options to find the perfect home for your project.
The Classic Jewel Case
When you picture a CD case, this is probably what comes to mind. The Jewel Case is the industry standard for a reason. It’s a three-piece plastic design with a hinged lid, a media tray (usually black or clear), and dedicated spots for printed artwork.
This classic setup gives you the most room to get creative with your inserts. You can slip a multi-page booklet into the front and a tray card in the back, giving you plenty of space for lyrics, credits, photos, or branding.
- Pros: It’s super protective, offers tons of space for printed booklets, and gives off that professional, retail-ready vibe.
- Cons: The plastic can be prone to cracking, and it feels a bit bulkier than some of the newer alternatives.
- Best For: Full-length albums, software, and any project that needs detailed liner notes.
The Modern Digipak
If you’re looking for something a bit more premium, the Digipak is a fantastic choice. It blends a sturdy cardboard shell with a plastic tray inside that snaps the disc into place. The result is a package that feels like a high-end book but still has the protection of a classic case.
Artists love Digipaks for their visual punch and eco-friendlier feel. They fold out to reveal multiple panels, creating a large, continuous canvas for your artwork to flow across the entire package.
Think of the Digipak as a canvas. Its foldable panels create a storytelling opportunity, letting you guide the listener through a visual journey that complements the audio on the disc.
This format just feels boutique, and it can seriously elevate the perceived value of your release.
The Minimalist Cardboard Sleeve
Often called a jacket or wallet, the Cardboard Sleeve is as simple and eco-friendly as it gets. It’s basically a printed cardboard pocket that the disc slides right into. The design is lightweight, thin, and perfect for projects where you want to keep things clean and cost-effective.
While it won’t offer the rugged protection of a hard case, its slim profile is perfect for mailing or handing out at shows. The entire surface is your canvas, letting your artwork shine without any plastic getting in the way.
- Best Suited For: Promotional giveaways, singles, EPs, wedding favors, and direct mail campaigns.
- Key Advantage: Very affordable, light on shipping costs, and has a clean, modern look.
Budget-Friendly Clear Sleeves
For projects on the tightest of budgets, or when you want the disc art to do all the talking, the Clear Plastic Sleeve is a great solution. It’s a simple, transparent vinyl envelope that protects the disc from dust and scratches while keeping your on-disc design completely visible.
These sleeves are incredibly inexpensive and take up virtually no space, which makes them ideal for mass distribution. While there’s no room for packaging art, they do their job perfectly: protecting your custom CDs without distracting from the artwork you worked so hard on.
Preparing Your Artwork for Flawless Printing
Great design deserves a great print. But one of the most common—and costly—mistakes we see when people order custom cds and cases is submitting artwork that isn’t properly prepared for a professional press. This section will break down the technical stuff into simple, practical steps so your vision looks just as good in your hand as it does on your screen.
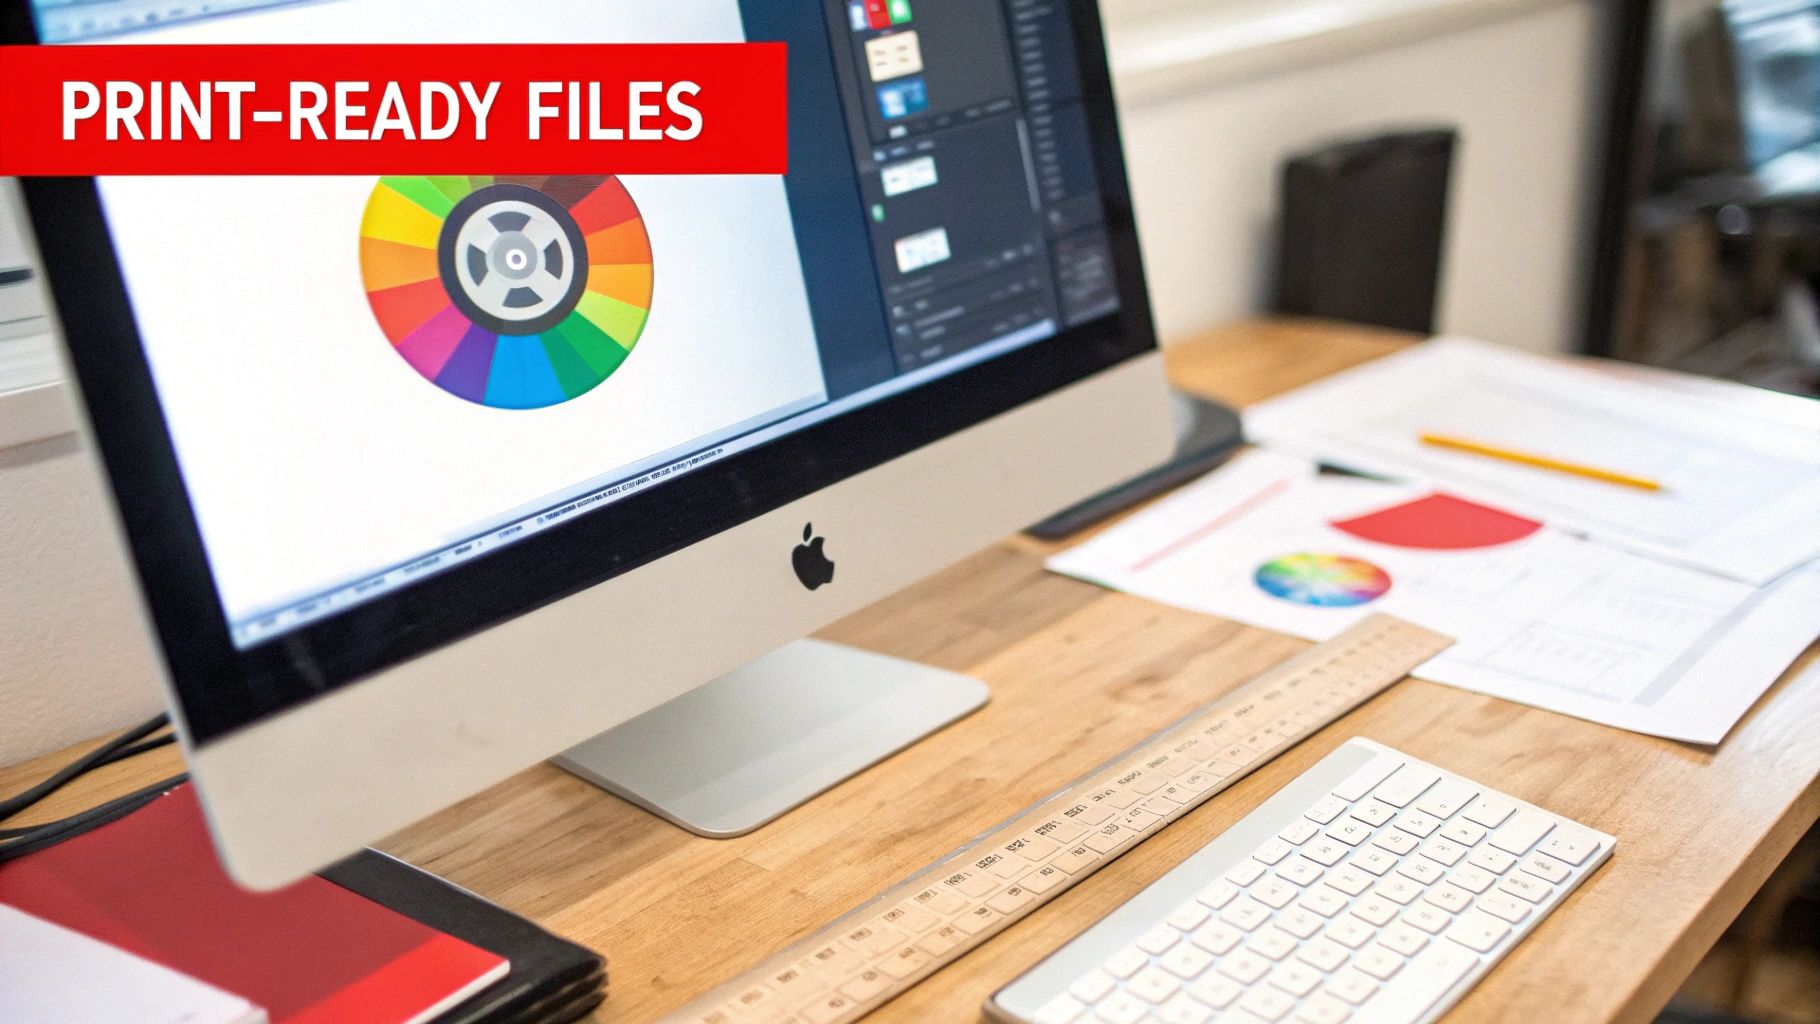
Think of these requirements not as restrictive rules, but as the recipe for a professional product. Following them from the start guarantees your artwork translates perfectly from a digital file to a physical, printed piece.
The Non-Negotiable Trio of Print Design
To get a flawless print, three concepts are absolutely essential: resolution, color mode, and bleed. Nail these three, and you’ll save yourself a world of time, money, and frustration.
- Resolution (DPI): Your artwork has to be designed at 300 Dots Per Inch (DPI). This is the gold standard for high-quality printing. If you use a lower resolution, like the 72 DPI common for web images, your final product will look blurry and pixelated. No exceptions.
- Color Mode (CMYK): All your art files must be in CMYK (Cyan, Magenta, Yellow, Black) color mode. Computer screens display colors in RGB (Red, Green, Blue), which has a much brighter, wider range of colors that simply can’t be reproduced with ink. CMYK is the four-color process printers use, and designing this way ensures the colors you see on screen are a close match to what comes off the press.
- Bleed Margin: A bleed is a small border of your artwork that extends past the final trim line. We require 1/8th of an inch (0.125″). This little “safety zone” ensures that if the cutting machine shifts by a hair, you won’t get ugly white slivers along the edges of your inserts or Digipak.
Honestly, submitting files without these elements is the number one reason for production delays. We’ll almost always have to put a project on hold and ask for corrected files, which pushes back your delivery date.
Think of a bleed like a painter taping off the edges of a wall. That little bit of overlap guarantees a crisp, clean line with no gaps. For your custom CD case, the bleed ensures your artwork covers every single millimeter of the final product.
Using Templates for Perfect Alignment
Every type of CD packaging—from jewel cases to cardboard sleeves—has its own unique dimensions, fold lines, and safe zones. Guessing these measurements is a recipe for disaster. That’s why using a design template isn’t just a good idea; it’s practically mandatory.
Templates are pre-made files for design software like Adobe Photoshop or Illustrator. They’re a precise blueprint showing you exactly where everything goes.
- Trim Line: The solid line showing where the product will be physically cut.
- Bleed Line: The outer line that shows how far your background image or color needs to extend.
- Safe Zone: An inner margin where all your critical text and logos should stay to avoid getting chopped off.
Here at Mixtape Duplication, we provide downloadable templates for all our custom CD case options. Using them is the single best way to make sure every part of your design is perfectly positioned. It takes all the guesswork out of the process and helps you submit print-ready files with confidence, leading to a smooth production and a final product you can be proud of.
How to Order Your Custom CDs
Ready to get your project started? Ordering custom CDs and cases isn’t complicated. It’s a straightforward path from your initial idea to the finished product sitting in your hands. We’ve broken down the whole thing into a few simple steps.
Think of it like getting a custom suit made. First, you get measured and pick your fabric (the quote). Then you show up for the fitting (submitting your files). You give the final okay after a quick check in the mirror (the proof), and then the tailor gets to work making the final product.
Step 1: Build Your Project Blueprint
It all starts with our instant quote tool. This isn’t just a price tag; it’s the complete blueprint for your project. You’ll choose your manufacturing style, the type of CD case you want, how many you need, and any cool finishes you’d like to add. The best part is seeing how your choices affect the price in real-time.
For example, you can instantly compare the cost of 200 duplicated CDs in simple cardboard sleeves versus 500 replicated CDs in full-blown Digipaks. This transparency helps you make smart decisions right from the get-go, making sure your vision fits your budget.
Step 2: Send Us Your Materials
Once you’ve settled on a quote and placed your order, it’s time to hand over the raw materials. We’ll need two key things from you:
- Your Master Audio: This is the final, polished version of your audio. We prefer a DDP file, but a folder of high-quality WAV files works great, too.
- Your Print-Ready Artwork: These are the design files for the CD face, any inserts, and the case itself, all formatted to our print specs.
Getting your files right is the single biggest thing you can do to keep your project moving smoothly. A quick double-check to make sure your art has proper bleeds and is in CMYK color mode can save you from major headaches and delays down the line.
Step 3: The All-Important Proofing Stage
After we get your files, our prepress team gets to work creating a digital proof. This is your last chance to look everything over before we hit the big green “GO” button. The proof is basically a digital picture of how your final printed parts will look. You’ll want to check for any typos, make sure images are where they should be, and confirm the colors look right.
Think of the digital proof as your safety net. It’s the final checkpoint to catch any mistakes. Once you approve it, we send your project to the presses, so please review it carefully.
The clock on your production time doesn’t start until we receive your official approval on this proof.
Step 4: Production and Shipping
With your approval in hand, your custom CD project officially hits the production floor. Now, it’s important to know the difference between two timelines:
- Turnaround Time: This is how long it takes us to actually make your discs and print the packaging. It can vary depending on what you ordered—replication, for example, takes a bit longer than duplication.
- Shipping Time: This is the extra time it takes for UPS or FedEx to get the finished CDs from our facility to you.
Always remember to account for both the turnaround time and the shipping time when planning for a deadline. By understanding each step in the process, you can plan your release without the stress, knowing exactly what to expect.
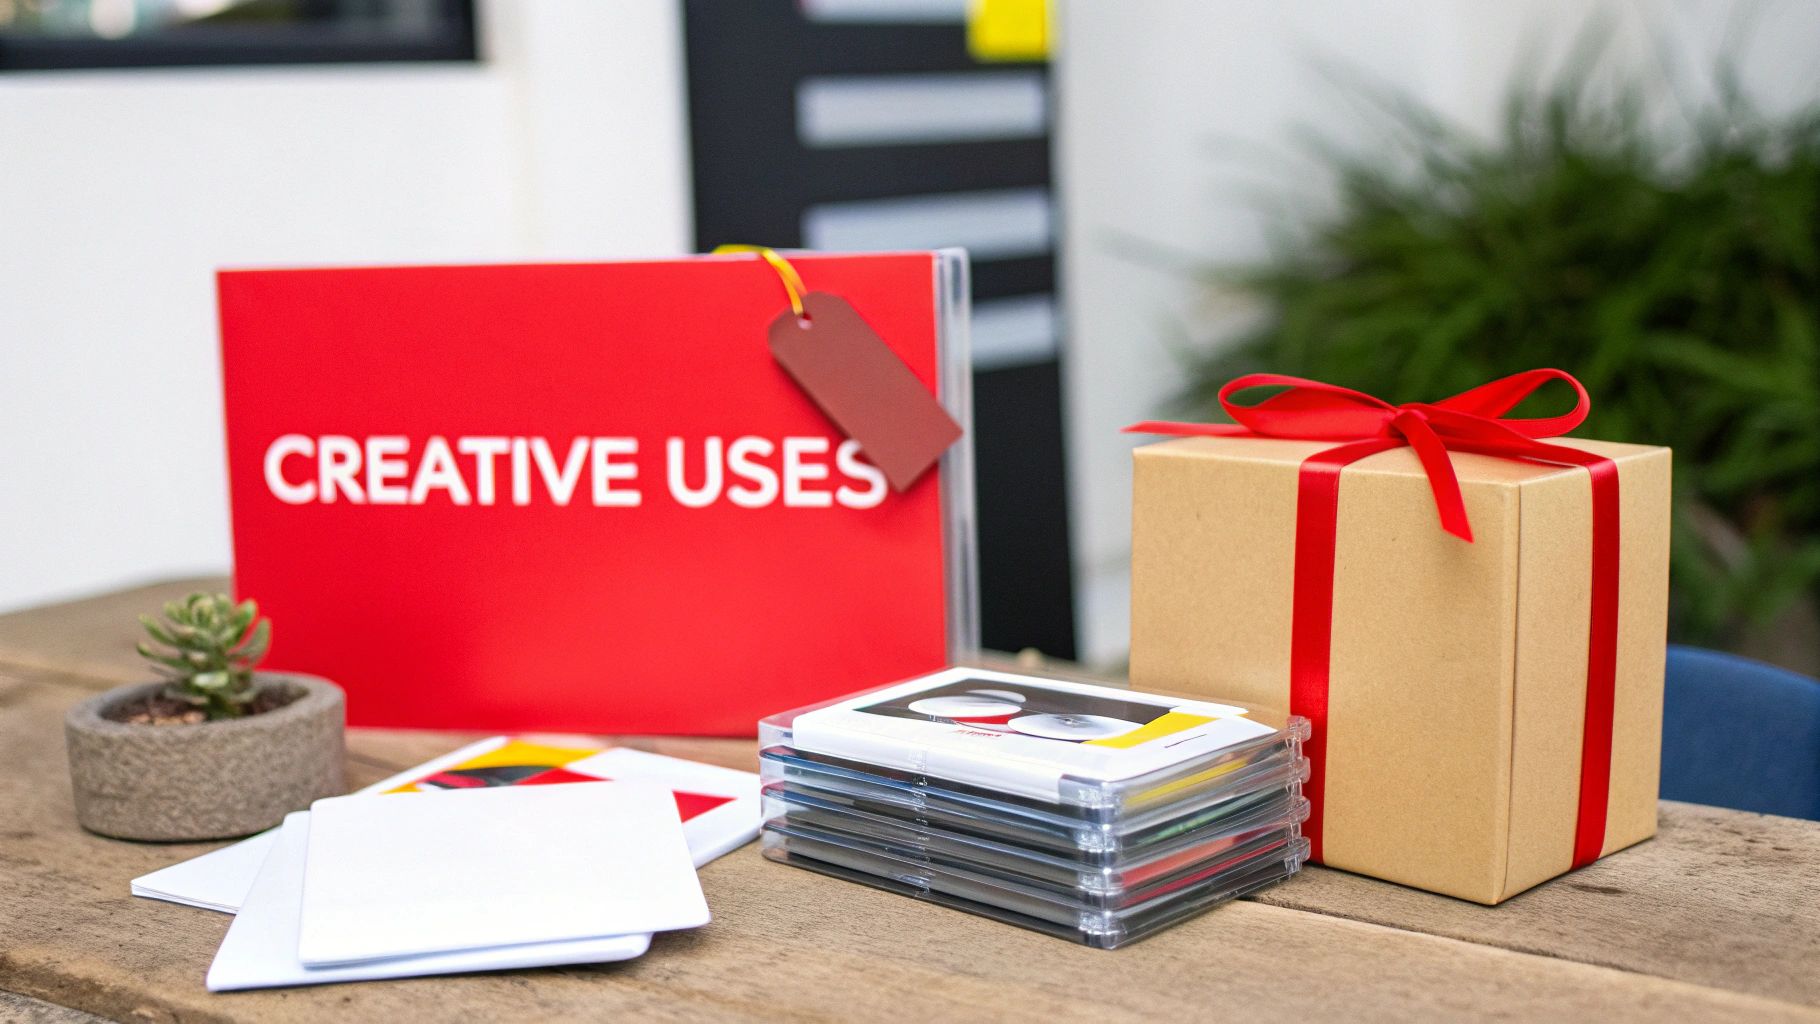
Creative Ways to Use Custom CDs and Cases
Thinking custom CDs and cases are just for music albums is like saying a guitar is only for one genre of music. The truth is, a custom disc is an incredibly flexible tool for business, art, and personal projects. It creates a memorable, physical experience that a simple digital file just can’t match.
From unique merchandise to unforgettable gifts, the real-world uses show just how creative you can get. This steady love for physical media is why the duplication disc market is still going strong, with a projected value of USD 750 million in 2025. It’s even expected to grow 5.8% annually through 2033.
This growth isn’t just random; it’s driven by niche markets that value the real connection of a physical product. You can read more about the resilience of the duplication disc market at archivemarketresearch.com.
For Artists and Creators
Sure, you need CDs for your album release. But think beyond that. Custom CDs can become exclusive, high-value merch that helps you connect with fans and make more money at your shows.
- Limited-Edition EPs: Why not press a short run of an EP with a bonus track or different artwork? It creates a must-have collectible for your biggest supporters.
- Live Performance Recordings: Capture the raw energy of a great show and sell professionally packaged recordings of the concert right after you get off stage. Instant gratification.
- Behind-the-Scenes Content: Give your fans a deeper look into your world. Put together a disc of demos, interviews, and documentary footage about how you create.
For Businesses and Professionals
Your email is probably overflowing. So are your clients’. A physical, branded item can cut right through that digital noise and actually leave an impression.
A custom CD is a professional handshake. It’s a tangible representation of your brand’s quality and attention to detail, transforming a simple data file into a sophisticated piece of marketing collateral.
Don’t just think of it as a data disc. Consider these options:
- Interactive Portfolios: If you’re a photographer, architect, or designer, deliver your portfolio on a beautifully designed disc. It offers a high-resolution, offline viewing experience that feels truly premium.
- High-Impact Press Kits: Want to get noticed by journalists? Send them a branded CD with your press release, high-quality photos, and video clips. It’ll stand out in a sea of emails.
- Software and Training Delivery: Distribute your software, new-hire onboarding materials, or training modules on a disc that feels secure, professional, and official.
For Personal and Memorable Gifts
Honestly, some of the most powerful uses for custom CDs are the most personal ones. They let you create one-of-a-kind keepsakes that hold memories and emotions.
- Anniversary or Wedding Mixtapes: Craft the perfect personalized playlist that tells a couple’s story through their favorite songs. Present it in a custom case with photos and a personal note.
- Audio Memoirs: Imagine recording a grandparent telling stories from their life. Compiling it onto a CD creates an audio heirloom for generations to come.
- Unique Party Favors: Making a soundtrack for a milestone birthday or wedding? Give guests a custom CD as a party favor they’ll actually use and remember the event by.
Answering Your Top Questions About Custom CDs
When you’re ready to make your own custom CDs and cases, a few common questions always seem to pop up. Getting straight answers can make the whole process feel a lot less intimidating. This section tackles the top queries we hear every day, giving you the confidence to get your project rolling.
Think of this as your quick-start guide, clearing up the confusion around the most important technical and creative decisions you’ll make. Let’s get into the details that matter most.
Duplication vs. Replication: What’s the Real Difference?
This is easily the question we get asked the most, and the answer really comes down to how many discs you need. Duplication is like burning a CD on a professional-grade computer; it’s perfect for small, quick orders, usually under 500 units. We take a high-quality, blank CD-R and write your data onto it with a laser.
Replication, on the other hand, is a full-blown industrial process. We create a glass master—a literal mold of your data—and use it to stamp out thousands of identical discs. This method is way more cost-effective for large orders of 500 units or more, which is why it’s the standard for major retail releases.
Why Are Artwork Bleeds So Important?
Ever seen a business card with a weird, thin white line along the edge? That’s what happens when artwork is missing a bleed. A bleed is just a little safety margin for your design that extends beyond where the final cut will be made.
Think of a bleed as a buffer zone for your art. By extending your background about 1/8th of an inch past the trim edge, you guarantee a professional, edge-to-edge print, even if the cutting blade shifts by a fraction of a millimeter.
Without it, you risk ruining the whole look of your CD inserts and cases. It’s a tiny step in the design process that makes a massive difference in quality.
Can I Put More Than 80 Minutes on One CD?
The official industry standard for a Red Book audio CD is 79 minutes and 57 seconds. While it’s technically possible to “overburn” a disc with a little more audio, we strongly advise against it. Pushing past this limit is asking for playback problems.
Many CD players, especially older ones or car stereos, will struggle to read an overburned disc. That means you could get skipping, errors, or it might not play at all. To make sure your custom CDs work for everyone, it’s safest to stick to the standard time limit.
How Long Does a Custom CD Order Take?
Your total wait time is a mix of two different things: production turnaround and shipping time. It’s super important not to get these two mixed up.
- Production Turnaround: This is the time we need to actually make your project. It changes based on the job—replication takes longer than duplication because of the whole glass mastering process. Our current schedule also plays a part.
- Shipping Time: This is the additional time it takes for a carrier (like UPS or FedEx) to get the finished boxes from our facility to your doorstep.
Always check our website for the most up-to-date turnaround estimates. And remember to factor in both production and shipping when you’re planning for a release date or event. That’s the best way to ensure your custom CDs arrive exactly when you need them.
Ready to create a unique and memorable gift? At Mixtape Duplication, we make it easy to turn your favorite playlist into a professionally crafted custom CD. www.cdinsertprints.com